Renting a storage room is easy. Setting it up so it actually helps your life instead of becoming a sealed-up monument to poor decisions is the harder bit.
Most people move in with good intentions. A few boxes here, a chest of drawers there, maybe a bike leaning against something important. Then six weeks later they need one document, one lamp, or one box of stock and suddenly they’re knee-deep in mystery cartons labelled “misc”.
That is not utility. That is delayed aggravation.
A good storage room should do three things well: protect your stuff, make it easy to access, and save you time. If you set it up properly from day one, you get more usable space, less hassle, and far less chance of damaging things by rummaging like a raccoon in a skip.
Here’s how to do it properly.
1. Decide what the room is actually for
Before you start stacking anything, be honest about how you’ll use the room.
Are you storing:
- household overflow while moving or renovating
- long-term keepsakes and furniture
- business stock and packaging
- tools, event kit, or seasonal items
- archive boxes and paperwork
Because each use needs a slightly different setup.
If you’re only storing long-term, you can pack more densely. If you’ll need regular access, that changes everything. You need visibility, routes through the room, and the items you use most near the front.
The biggest mistake people make is treating every box as equally important. It isn’t. Your Christmas decorations do not deserve front-row status in March. Your e-commerce stock probably does.
2. Create zones before you unload
Do not just start piling things in wherever they fit. That’s how storage rooms become archaeological digs.
Split the room into simple zones:
- Front: items you’ll need often
- Middle: medium-priority items
- Back: long-term storage
- One side: fragile or awkward items
- Another side: boxes of similar category or purpose
For example, a household storage room might look like this:
- front = suitcases, kids’ gear, paperwork, tools
- middle = spare kitchen kit, boxed clothes, small furniture
- back = keepsakes, rarely used decor, archived belongings
A business setup might be:
- front = fast-moving stock, labels, packing materials
- middle = slower stock lines
- back = archives, spare fixtures, dead stock you’re pretending will become useful again
Zoning sounds basic because it is. Humans love making simple things difficult.
3. Leave yourself an access path
This is the part people ignore until they need something from the back.
Leave a narrow walkway or at least a clear reach route into the room. You do not need a grand corridor fit for a shopping centre, but you do need a way to get to the middle and back without unloading half the unit.
That means:
- heavier items at the bottom
- boxes stacked securely, not randomly
- furniture placed around the edges where possible
- no “wall of doom” across the entire front
Think of it like a tiny warehouse, not a game of storage Tetris.
If you pack every cubic inch with no thought for access, you may technically fit more in, but the room becomes less useful. Maximum utility is not the same as maximum cram.
4. Label like a sane person
Writing “bedroom” on a box is only slightly better than writing nothing.
Use labels that tell you:
- room
- contents
- priority
- fragile or not
- whether it can be stacked
A better label looks like this:
Loft / Photo frames + lamp shades / Low priority / Fragile / Do not stack
That tells you nearly everything you need in seconds.
Even better, number the boxes and keep a basic list on your phone:
- Box 1: winter clothes
- Box 2: office cables and tech
- Box 3: kids’ books
- Box 4: spare kitchen gear
No need for some fancy warehouse management system unless you’ve lost all sense of proportion. A simple note is enough.
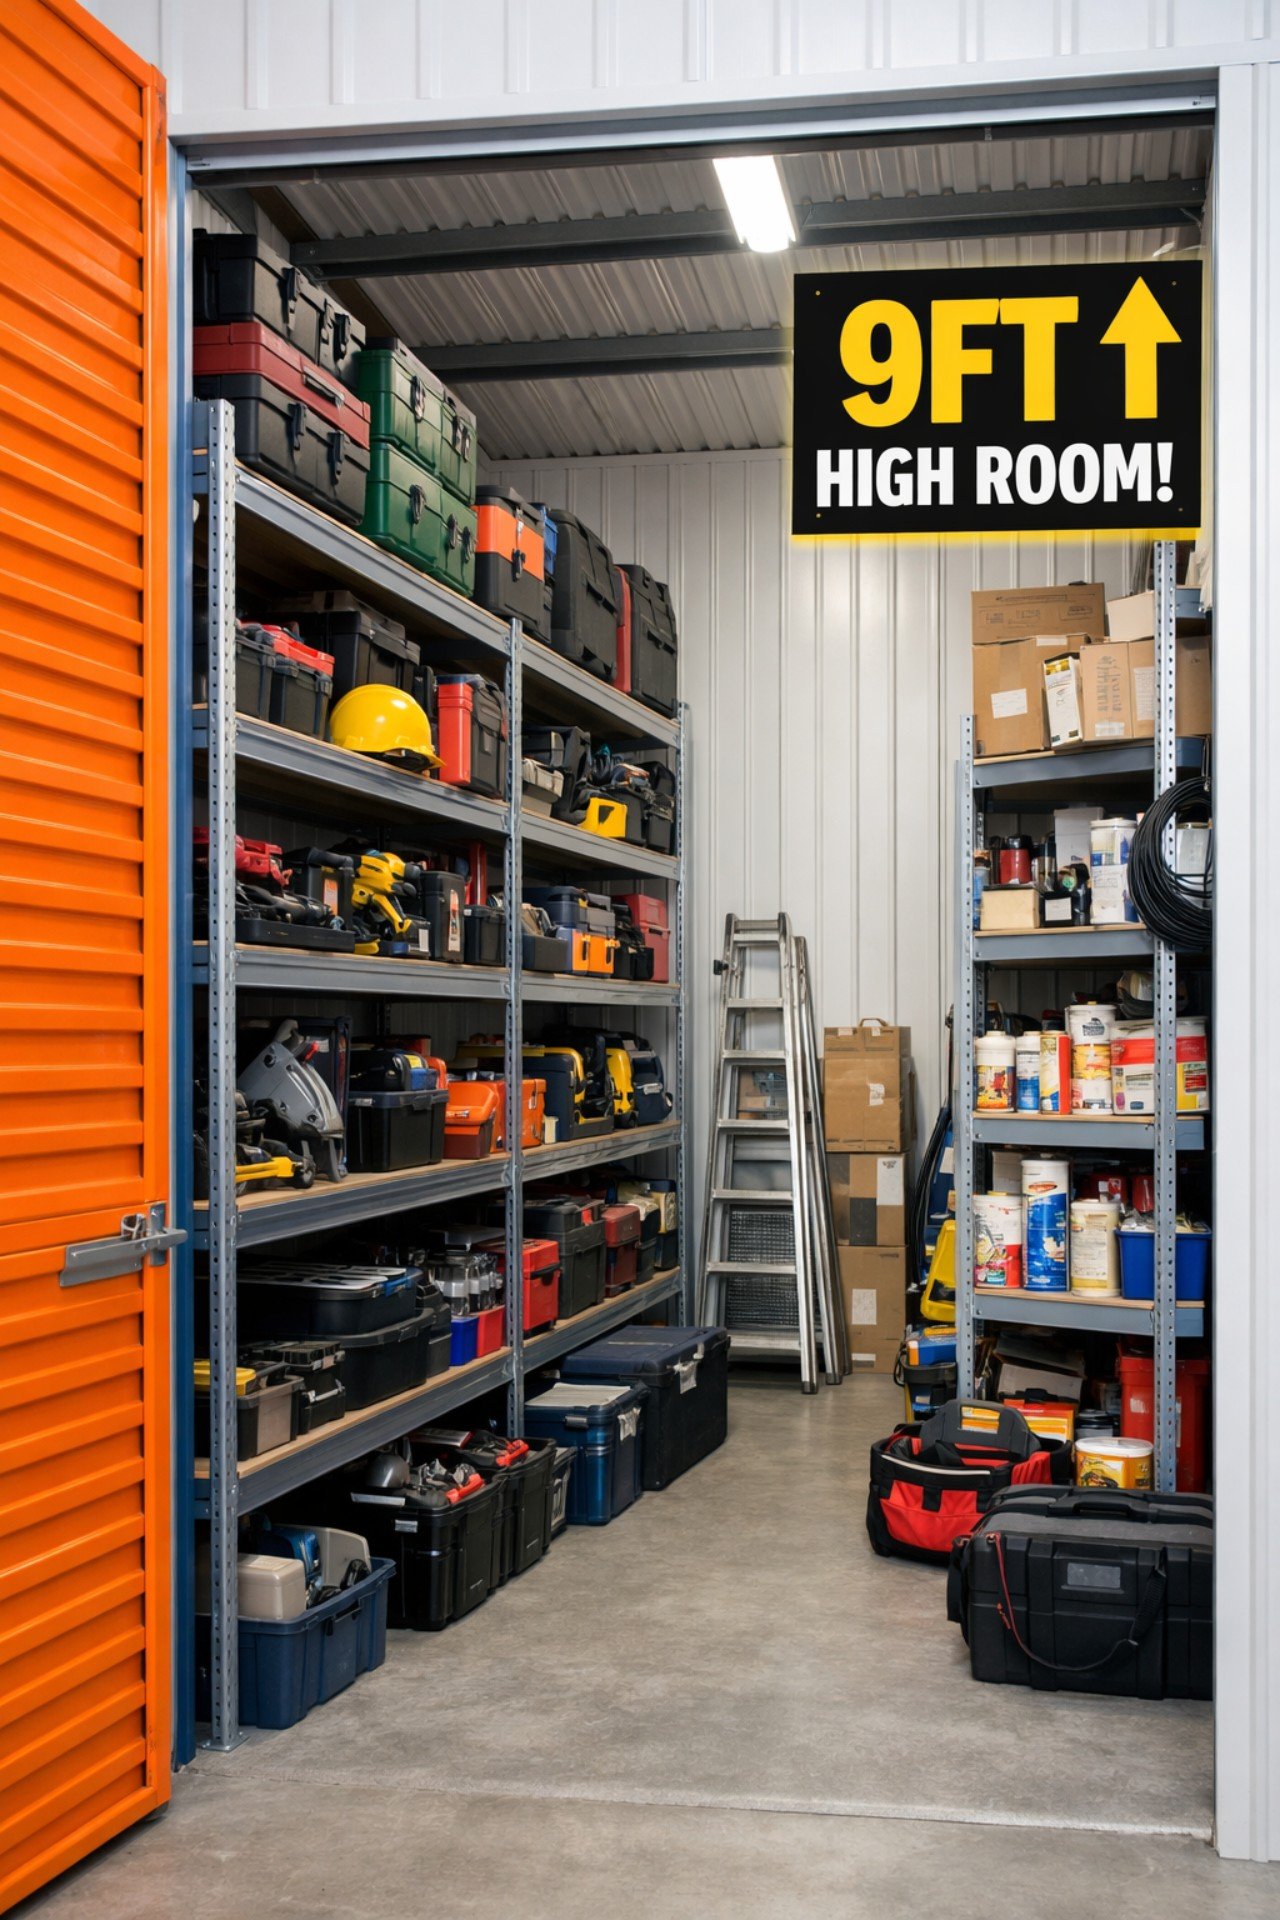
5. Put shelving or stack strategy to work
If you’re storing lots of boxes or business stock, shelving can make a huge difference. It turns the room from a pile into a system.
Shelving works best for:
- archive boxes
- stock for small businesses
- packaging materials
- tools and smaller equipment
If you’re not using shelving, stack with intent:
- heaviest boxes on the bottom
- same-size boxes together where possible
- fragile items on top
- frequently used boxes no higher than easy reach
- avoid unstable towers built on hope
The goal is not just to fit items in. The goal is to be able to remove one thing without causing a cardboard avalanche.
6. Use the full height, but don’t be stupid
A proper indoor self storage room gives you height to work with, and that’s valuable. Use it.
But use it sensibly.
Tall items like bookcases, mattresses, mirrors, and dismantled furniture can usually go upright along the walls if protected properly. Lighter boxes can go higher up. Bulky but soft items like duvets or cushions can fill awkward spaces.
Just don’t put heavy boxes overhead, don’t crush fragile things, and don’t build stacks so high you need a prayer and a stepladder every time you visit.
Good use of height creates more floor space. Bad use of height creates regret.
7. Protect what matters most
Maximum utility also means not wrecking your belongings.
A few basic rules:
- cover furniture to keep it clean
- keep mattresses upright if suitable and protected
- store electronics in labelled boxes with padding
- avoid overfilling boxes so they split
- keep important documents together and easy to reach
- put sharp or awkward items where they won’t damage softer goods
For business users, keep stock off the floor where practical, separate sellable stock from tools or dirty gear, and make sure your most-used lines are the easiest to pick.
Convenience matters, but protection matters too. There’s not much value in a “well-packed” room if you’ve crushed the dining chairs under three boxes of forgotten cables.
8. Think about what you’ll need first
One of the smartest things you can do is create a quick-access area right at the front.
This is where you keep things you may need at short notice, such as:
- paperwork
- chargers and basic tech
- cleaning kit
- overnight bag or suitcase
- stock top-ups
- hand tools
- seasonal essentials
This one habit saves a ridiculous amount of time. It also stops you dragging everything out every time you need one small item.
Future You is busy enough already.
9. Review the room after the first week
Once you’ve moved in, revisit the setup after your first couple of visits.
Ask:
- what have I needed most often?
- what’s awkward to access?
- which boxes are in the wrong place?
- am I wasting space?
- is there anything that should be grouped better?
A storage room is not a tattoo. You can improve it.
Small changes early on make the room far more useful over the next few months.
Making your storage room work harder in Tamworth
If you’re using self storage in Tamworth, whether for moving house, decluttering, running a small business or storing archive boxes, the best setup is the one that saves you time and stress every single visit.
At Brown Box, we see it all the time: people who plan their room properly get more use out of the space, find things faster, and generally avoid the “where the hell did I put that?” routine.
You don’t need perfection. You just need a simple system that makes sense.
If your storage room is working against you, it’s not storage. It’s just off-site chaos.
Final thought
A good self storage room is not just about fitting more stuff in. It’s about making the space genuinely useful.
Zone it. Label it. Leave access. Use the height sensibly. Keep important things reachable.
Do that, and your storage room becomes a practical extension of your home or business, not a locked room full of delayed admin and cardboard shame.
If you’re in Tamworth and want a clean, secure indoor storage room that’s easy to use properly, Brown Box can help you choose the right size and set it up sensibly from day one.